What x402 means for data sellers
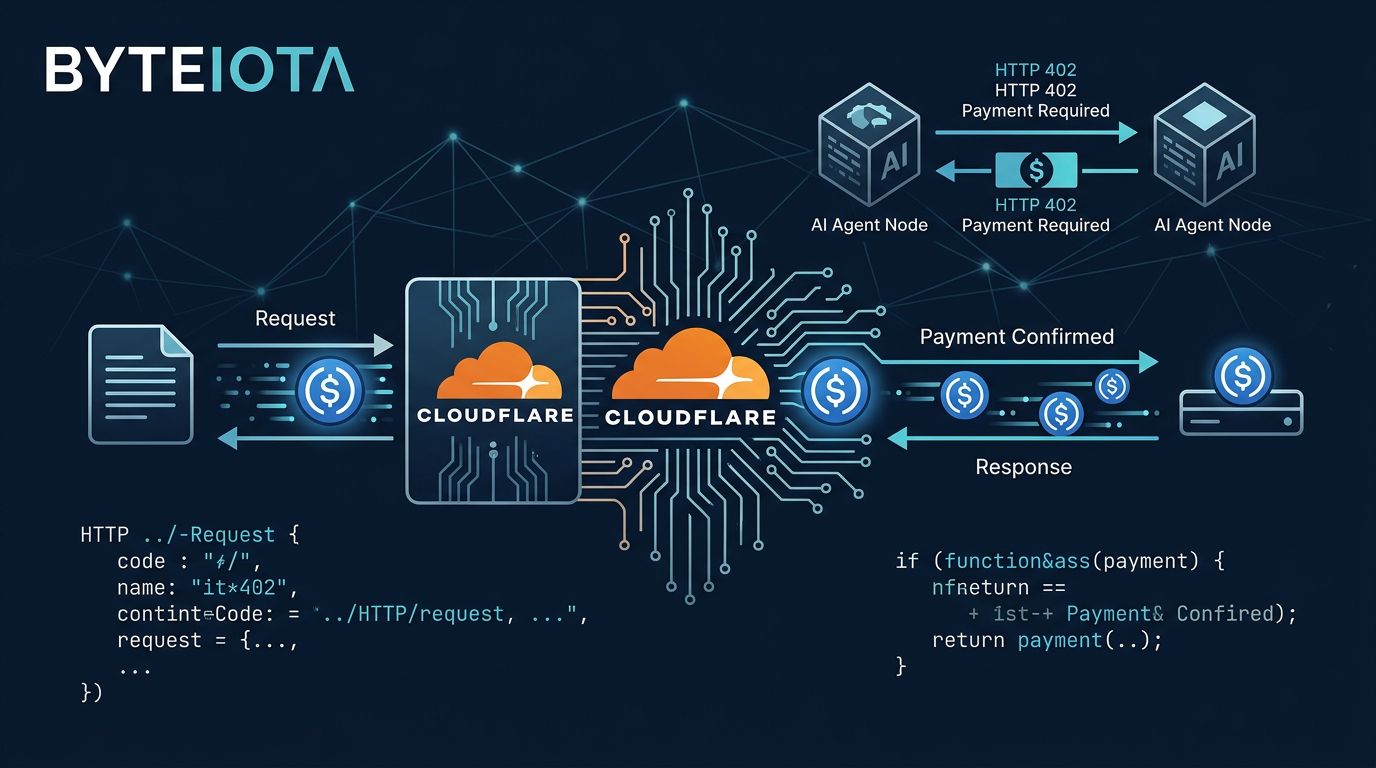
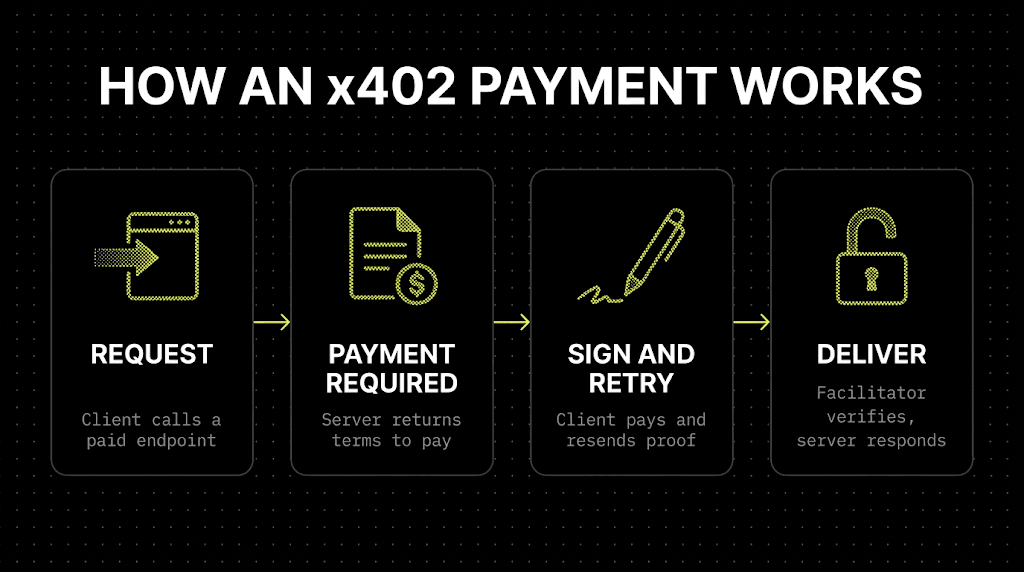
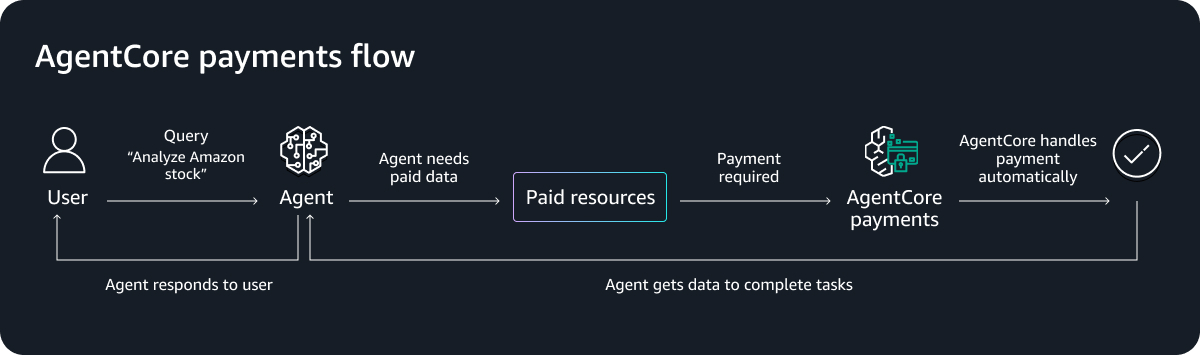
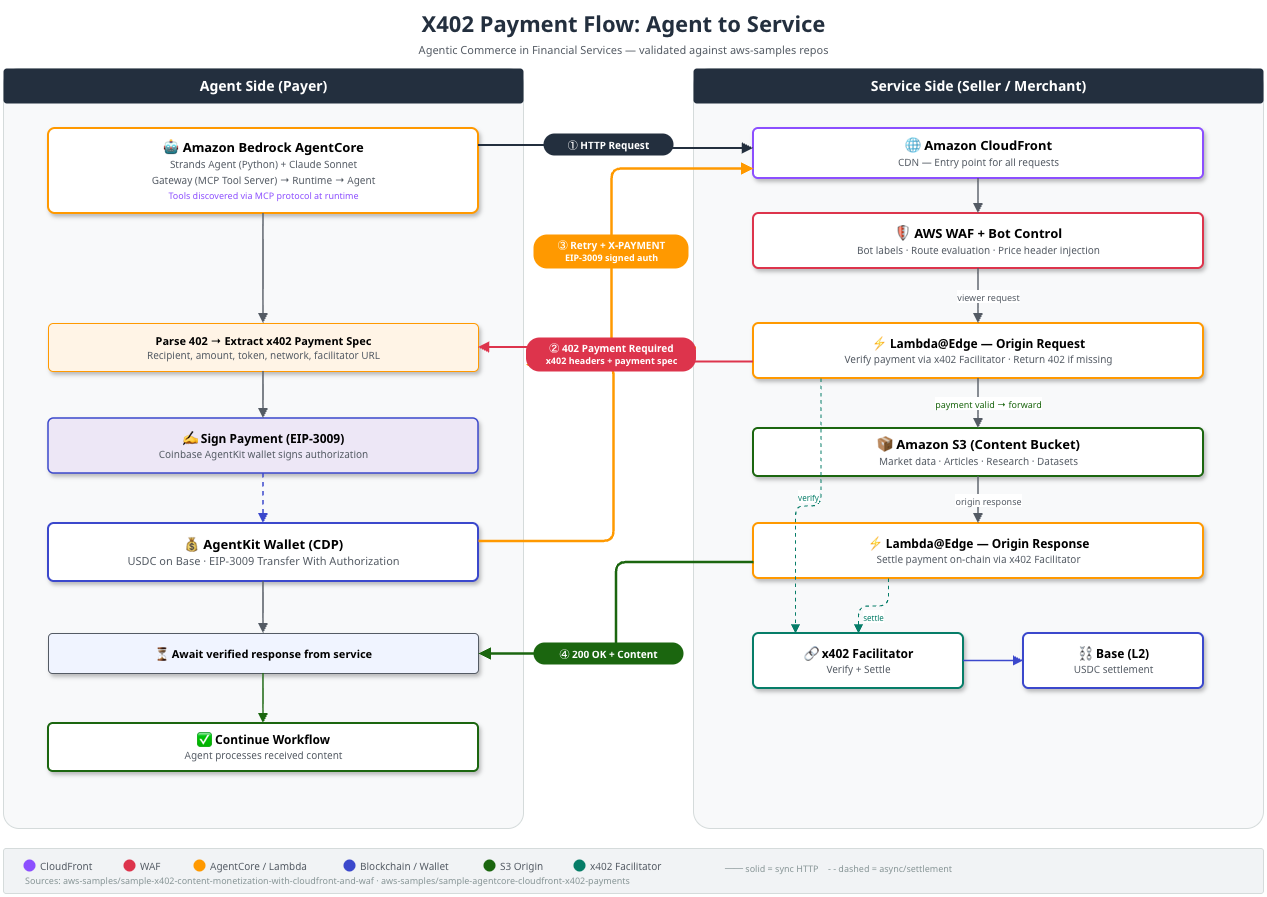
x402 is the HTTP 402 Payment Required standard, a protocol layer that enables machine-to-machine commerce without human intervention. Unlike traditional payment gateways that require user authentication, credit card tokens, or manual checkout flows, x402 embeds payment logic directly into the HTTP response cycle. When an AI agent requests a premium research feed, it receives a 402 status code with a payment instruction. The agent pays, receives the data, and continues its task. This is not a checkout page; it is a protocol-level handshake.
For data sellers, this distinction is critical. Traditional web monetization relies on friction-heavy processes: account creation, subscription management, and payment verification. x402 removes these barriers. An AI agent can autonomously negotiate, pay, and retrieve data in milliseconds. This makes it uniquely suited for high-frequency, low-latency data feeds where human interaction is impossible or impractical.
The standard treats payment as a first-class citizen in HTTP. This aligns with the original intent of the HTTP specification, which included 402 for future electronic commerce. Today, that future is here. AI agents are no longer just consuming open data; they are buying access to proprietary, premium research feeds. x402 provides the infrastructure for this agentic economy, allowing data sellers to monetize their assets directly to machines, not just humans.
Setting up the x402 facilitator
To build premium research feeds that actually get paid, you need a payment facilitator. The x402 facilitator SDK acts as the middleware between your API and the blockchain, handling the complex logic of verifying payments before granting access to data. Without it, your endpoints remain open to free use or require manual transaction monitoring.
This setup process focuses on the technical implementation details required to integrate the facilitator into your existing infrastructure. We will walk through installing the SDK, configuring environment variables, and initializing the middleware so your API can natively accept crypto payments.
Begin by adding the x402 facilitator package to your project. Depending on your runtime environment (Node.js, Python, or Go), use your standard package manager to install the library. This package provides the core classes and utilities needed to intercept API requests and validate blockchain transactions.
Create a .env file to store your sensitive configuration details. You will need to set your wallet private key (or use a secure key management service), define the specific blockchain network (e.g., Base, Ethereum), and set your API key if you are using a specific indexer. Never hardcode these values in your source code.
Import the facilitator module in your main server file and instantiate the client. Pass your configuration object to the constructor. Ensure the facilitator is initialized before your API routes are registered so it can properly intercept incoming requests and apply the payment verification logic.

Wrap your premium research endpoints with the facilitator's payment verification middleware. This ensures that every request to your data feed includes a valid x402 payment proof. If the payment is missing or invalid, the facilitator will reject the request before it reaches your business logic.
Use a local test wallet to send a small transaction to your endpoint. Verify that the facilitator correctly identifies the payment and allows access to the data. Check your server logs to ensure the payment verification steps are executing as expected and that no security vulnerabilities are exposed.
| Component |
|---|
| Facilitator SDK |
| API Gateway |
| Blockchain |
Configuring payment-gated responses
When a client requests a premium research feed without valid proof of payment, your endpoint must respond with a 402 Payment Required status. This is the core mechanic of the x402 protocol: it signals that the resource is locked behind a microtransaction. Rather than returning a generic error or a cached snippet, you need to structure the response to guide the client toward payment.
The response body should contain clear instructions on how to pay. This typically includes the amount due, the cryptocurrency address or payment link, and any specific metadata required by your payment facilitator. For example, using a service like Browserbase or a custom x402 facilitator, you can dynamically generate a payment URL that the client’s middleware can parse.
app.get('/api/premium-research', async (req, res) => {
  const proof = req.headers['x-payment-proof'];

  if (!proof || !verifyProof(proof)) {
    return res.status(402).json({
      error: 'Payment Required',
      message: 'Please pay to access this research feed.',
      payment: {
        amount: 0.001,
        currency: 'ETH',
        link: 'https://your-facilitator.com/pay?endpoint=research'
      }
    });
  }

  // Proceed to fetch and return premium data
  const data = await fetchPremiumData();
  res.json(data);
});
Verification is equally important. Before granting access, you must validate that the x-payment-proof header contains a valid signature or transaction hash. This ensures that the client has actually completed the transaction. If the proof is missing or invalid, the 402 response is your way of saying, "The door is locked; here’s the key cost." This flow keeps your premium data secure while automating the payment process for legitimate users.
Handling USDC Settlement on Base
x402 endpoints on the Base network leverage USDC to enable frictionless micropayments. Because Base offers low transaction fees, you can charge fractions of a cent for API calls without the overhead eating into the margin. This makes it viable for AI agents to pay for high-frequency data queries or compute tasks in real time.
To start accepting payments, you need a wallet capable of signing x402 headers. The Coinbase Developer Platform (CDP) provides the standard tooling to generate and manage these keys. Your API must verify the signature against the sender's public key before returning data, ensuring that payment is a prerequisite for access.
Once a payment is submitted, it settles on-chain. For developer workflows, finality is handled through webhooks rather than polling. You should configure an endpoint to listen for payment_confirmed events from the settlement layer. This allows your backend to immediately grant access to the requested resource once the transaction is verified, creating a seamless experience for the buyer.
Testing endpoints with AI agents
Validating an x402 endpoint requires more than standard HTTP status checks. You need to ensure the payment flow doesn't break the agent's execution loop, particularly when handling temporary network blips or insufficient funds.
The goal is to simulate an autonomous agent's behavior: it attempts a request, receives a 402 if unpaid, processes the payment, and retries. If this sequence fails, the agent might enter a retry storm or abandon the task entirely.

Use this checklist to verify your endpoint's robustness before deploying to production:
- Verify Retry Logic: Ensure the agent retries after a successful payment. Some agents cache the 402 state incorrectly.
- Test Idempotency: Confirm that duplicate payment transactions don't result in duplicate charges or data corruption.
- Check Timeout Handling: Agents may timeout if the payment gateway is slow. Ensure your endpoint handles partial responses gracefully.
- Validate Error Codes: Confirm that non-payment errors (like 500s) are distinct from 402s so the agent knows when to stop retrying.
For a deeper look at how agentic commerce handles these flows, see the AWS blog on x402 and agentic commerce.
Helpful gear
Use these product recommendations as a starting point, then choose the size, material, and price point that fit how you actually use the gear.

As an Amazon Associate, we may earn from qualifying purchases.
No comments yet. Be the first to share your thoughts!